Getting started
Let’s have a look at a typical R3DS Track pipeline.
We start with Load mode. In the Sequence field, let’s select the sequence of scan renders (See: Loading a Sequence).
For faster playback, let’s cache the sequence using the Cache Selected Range button (See: Cache Settings).
Tracking Markers
Let’s enter Track mode.
This mode contains tools for tracking markers.
You can create a marker by clicking the Create button or by pressing the C key and clicking on the image on the Viewport.
Successful marker tracking greatly depends on the sizes of the Pattern Window and Search Window. You can adjust them by dragging their borders on the Viewport. Find out more about it here.
Press the Track Forward button or the ] key to start tracking.
Let’s create a marker on the actor’s forehead and rename it by clicking the Rename button or pressing the F2 key.
Let’s set the Basename parameter to Forehead so that all the further forehead markers have the same prefix.
To track multiple markers at the same time, you can select them in the Markers list or on the Viewport and repeat the steps above (See: Tracking).
To export the result, select all the markers and click the Export button to save the results into a sequence of JSON files.
Detection
Let’s enter Detect mode.
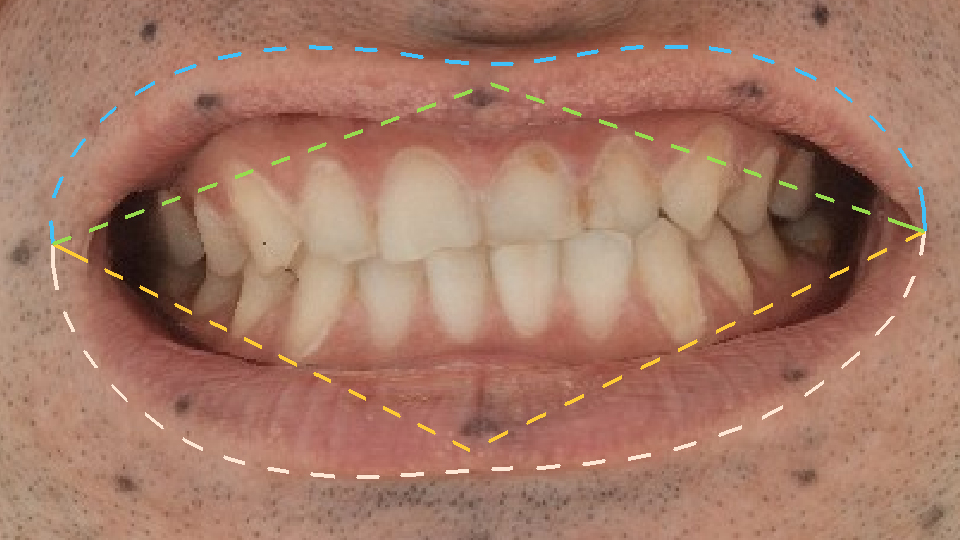
This mode contains tools for detecting lip and eyelid contours. Let’s click the Detect button in the Precompute submenu.
The lip and eyelid contours will be detected for each frame of the sequence using a generic detector based on machine learning (See: Precomputing).

The result of the generic detector is not very accurate. You can improve it by using a personalized detector (See: Personalized detector). We train the personalized detector by annotating a set of training frames. The training frames should contain extreme variations of lip and eyelid shapes (See: Selecting training frames).
Let’s find a neutral facial expression of the actor in the sequence and select Lips in the Segments list. After that, let’s create a training frame by clicking the Create button in the Training Frames submenu, then click OK in the pop-up window (See: Semantic points). By default we use 5 semantic points for the lip contours.
Now that the neutral training frame has been created, we can adjust it by clicking the Edit button or pressing the E key.
Let’s exit Edit Mode by pressing the E key again and create a few more training frames for the lip contours.
Tip
Semantic points on training frames should be set as consistently as possible. The higher the accuracy when setting semantic points, the better the result.
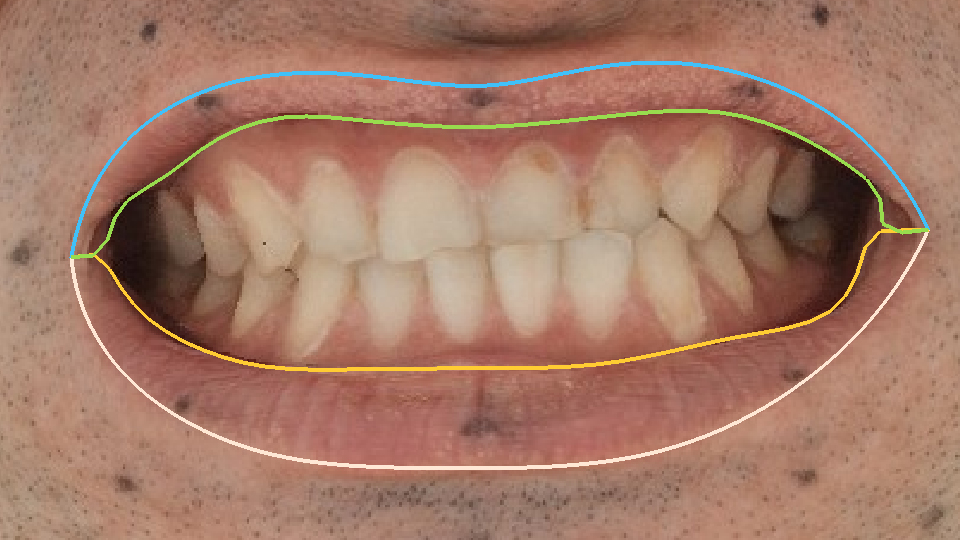
After annotating all the training frames for the lips, click on the Compute button. The difference between the result of Detection and Computation you can see in the picture below.
|
|
Detect |
Compute |
As training frames try to select the most extreme variations of lip shapes. After computing the detection, look through the results and find the most inaccurate frames. Add the expressions that you think are missing and compute again. This way, you will use as few training frames as possible while producing good results. Let’s repeat the same steps for the left and right eyes and switch to Filter mode after that.
Filter
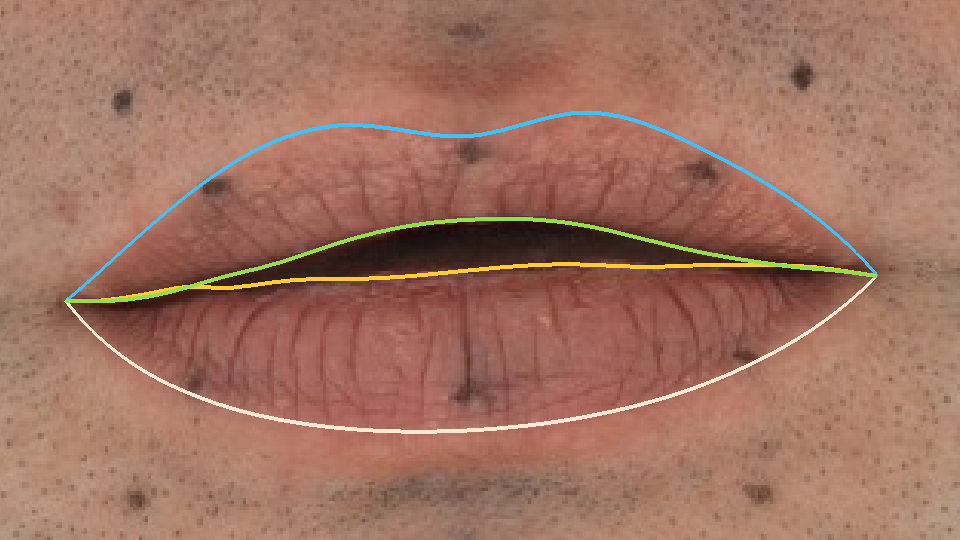
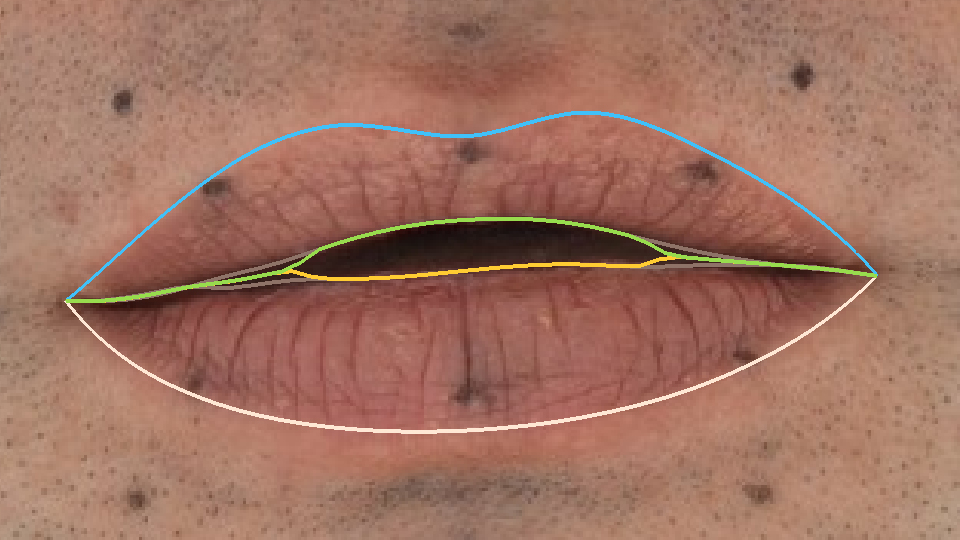
Filter mode contains a tool for creating the sticky lips effect for the contours of the inner lips (See: Filter Mode) Press the Filter button and see the new result.
|
|
No Filter |
Filter |
Click the Export button to export the results into a sequence of JSON files. In the dialog that appears, make sure that the Segments parameter is set to All.
The exported markers and detection results will be used during the further steps of the 4D processing pipeline.